Lower South Cave Map & Location
Artifact of the Hunter · Megapithecus boss
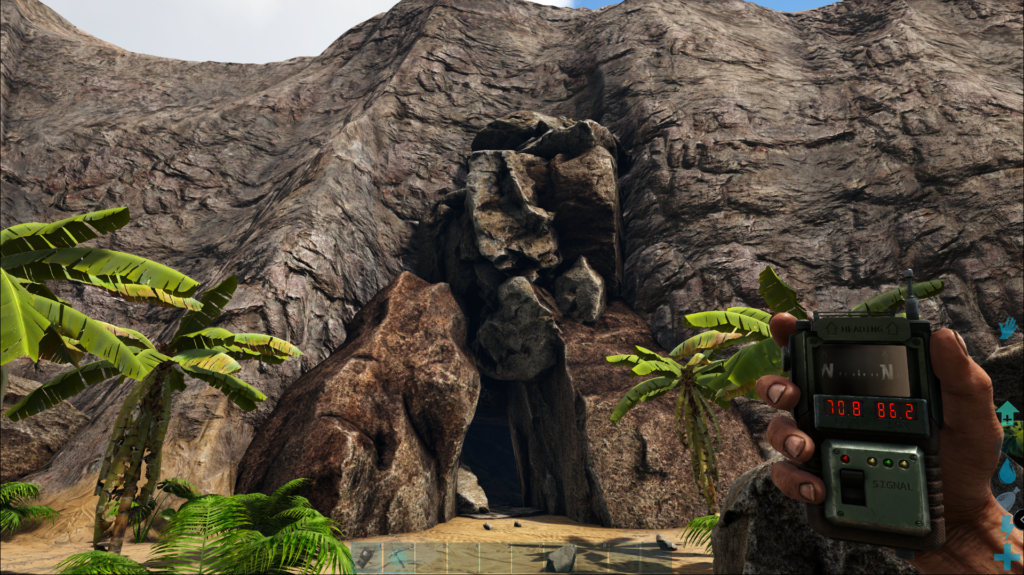
Lat 85.3, Lon 54.2
Nestled in a shallow canyon in the south, the Lower South Cave is the easiest cave on The Island and most often the first cave new survivors clear. Enemies spawn in small clusters rather than overwhelming swarms, which makes it forgiving even with mid-tier gear.
Layout note: the artifact sits at the back of the cave after a steep drop. Stick to the left side as you enter and keep an eye on your footing — falling down the drop too early skips half the loot.
Pro tip: Keep Lesser Antidotes on you for every Island cave — Onyc bites can give you Mega Rabies, which doesn't go away on its own.
Central Cave Map & Location
Artifact of the Clever · Broodmother boss
Lat 40.2, Lon 46.6
Located near the volcano in the dead center of the map, the Central Cave is mostly straightforward — common cave critters with the one big exception: Megalosaurus can spawn inside, and if it does, it's a real fight. The good news is Megalosaurus is only active at night, so daytime runs are dramatically safer.
The artifact is at the back of the cave, so plan to clear most of the enemy spawns to get there. Mobs spawn in large groups here, so pick a mount with serious HP and bring whistle commands you've drilled.
Pro tip: Time your run for daylight in-game. Megalosaurus only attacks at night, and the difference between a 5-minute run and a 25-minute fight is just the clock.
North East Cave Map & Location
Artifact of the Devourer · Megapithecus boss
Lat 8.9, Lon 91.3
The cave sits on the dangerous Carnivore Island in the north-east corner of the map — getting there is harder than the cave itself. Inside, the layout is simple but features a big vertical drop down to the artifact. Megalania spawn on walls and ceilings here and can inflict Mega Rabies, so keep antidotes ready.
The fast strategy: breed a Thylacoleo inside the cave and mount-jump to the bottom. This skips most of the climb but aggros everything on the way down, so make sure your Thyla has decent levels in health and damage.
Pro tip: The cave is on Carnivore Island, which is overrun with Rexes, Carnos, and Allos. A flyer to drop you near the entrance is way safer than walking the coast.
Lava Cave Map & Location
Artifact of the Massive · Broodmother boss
Lat 74.1, Lon 92.2
The Lava Cave is in the south-east of The Island and is mostly a navigation puzzle. The cave is hot enough that you'll need heat protection (Calien Soup is the cleanest fix; full Ghillie armor also works), and several gaps in the floor have to be jumped. Miss a big jump and you drop into lava — that's almost always a wipe for both you and your mount.
The enemies inside are easy compared to most caves — your real opponent is the layout. The Artifact of the Massive sits on a tiny island surrounded by lava, completely separated from the path.
Pro tip: Don't try to jump to the artifact island. Stand on the closest ledge, fire a grappling hook + crossbow combo to a pillar on the artifact island, and grapple across. Costs zero attempts, zero stress.
Upper South Cave Map & Location
Artifact of the Pack · Megapithecus boss
Lat 71.3, Lon 57.2
Despite the name suggesting a regular cave, the Upper South Cave is predominantly underwater. That changes everything about how you prepare. You'll spend most of the run swimming through narrow channels with limited oxygen and aquatic predators on top of the usual cave hazards.
The Baryonyx is the obvious mount choice here — it's fast in water, has effectively unlimited stamina underwater, and its tail spin stuns aquatic enemies. For your own oxygen, Lazarus Chowder slows oxygen consumption to about 15% of normal, making the swim sections genuinely chill instead of panic-inducing.
Pro tip: Many guides (including older ones) describe this cave as a land cave full of snakes. That info is from older ASE patches. In current ASA, it's an underwater cave — pack accordingly.
Swamp Cave Map & Location
Artifact of the Immune · Dragon boss
Lat 64.8, Lon 35.1
The Swamp Cave is wall-to-wall insects in a gas-filled tube, sitting in the southern swamp biome. A Gas Mask or SCUBA tank is non-negotiable — the poison gas inside ticks down your health constantly without one. The entrance is also extremely narrow, which limits the mounts that fit. Baryonyx can squeeze in, and if you have a Megatherium bred inside the cave it absolutely shreds the insect spawns because of its damage bonus against bugs.
Alternative strategy: if you don't have a mount ready, pop Bug Repellent and grapple through the cave on foot. Insects will ignore you, but stay out of physical contact — touching them still triggers aggro.
Pro tip: A Megatherium bred inside the Swamp Cave is one of the strongest cave-clearing setups in the game. The insect-killer bonus is brutal, and its size lets it tank hits the Baryonyx can't.
Caverns of Lost Faith Map & Location
Artifact of the Brute · Broodmother (optional / alt)
Lat 54.4, Lon 3.9
The first of the two fully-underwater artifact caves, off the west coast of The Island. The real threat inside isn't visibility loss (though that's annoying) — it's the Electrophorus and Cnidaria that lurk around tight bends and stun you and your mount mid-fight. A stun underwater means drowning if you're not on the right mount.
The Basilosaurus is the dream pick here — it's immune to stuns, soaks damage, and a high-level one with a good saddle has zero trouble with Cnidaria packs. Since ASA added a cooldown on the stun debuff, Megalodons are also viable — a high-level Meg can usually survive the initial five-second stun and counter-attack.
Pro tip: Bring a backup mount. If your primary gets stunned at the wrong moment in the narrow bends, you can spawn the backup from a cryopod outside and double up.
North West Cave Map & Location (The Crawl Cave)
Artifact of the Skylord · Dragon boss
Lat 14.1, Lon 13.9
Known in the community as The Crawl Cave, the North West Cave is unique on The Island for one reason: you can't bring a mount in. The corridors are too tight. You're facing every cave enemy on foot, in extreme cold, with multiple instant-death pits that will end the run if you mis-step.
Layer up with the best fur armor you can craft and either eat Fria Curry or carry an Otter on your shoulder for insulation (Otters give a permanent insulation buff and can hold an artifact for safekeeping while you fight). For combat, a sword and shield is surprisingly effective for the tight quarters, but if you have decent armor a Pump-Action Shotgun shreds the cave critters in one or two shots.
Pro tip: Drop a Sleeping Bag near the entrance before you go in. If you wipe deep in the cave, you'll respawn close enough to recover your gear before despawn timers run out.
Caverns of Lost Hope Map & Location
Artifact of the Cunning · Broodmother boss
Lat 45.4, Lon 95.0
The second underwater artifact cave, located far off the south-east coast. This is one of the hardest caves in all of ARK: Survival Ascended. Alpha Megalodons often spawn here, and their aura buffs nearby creatures' defense and damage — meaning even low-level Mantas and Piranhas become legitimate threats when an Alpha is nearby.
The winning strategy is a Basilosaurus mount with several Megalodons trailing as an attack pack, all wearing high-tier saddles. The Basilo soaks Electrophorus stuns and big-hit damage; the Megalodon pack handles the swarms. Going in solo on a single mount is technically possible but you'll burn through medical brews fast.
Pro tip: Bring the Megalodons to the cave entrance in cryopods, then deploy them just before entering. Saves you the long swim out with a pack that won't keep up with your Basilo's speed.
Snow Cave Map & Location
Artifact of the Strong · Dragon boss
Lat 26.0, Lon 29.0
The Snow Cave isn't just hard — it's the hardest cave on The Island, by a wide margin. Untameable Polar Bears, Direwolves, Yetis, and Purlovias all spawn here, and they spawn at very high levels (up to 340 on default settings). The cave is freezing cold; water inside the cave actively damages anything that enters it. And Purlovia ambush you from underground, dismounting you mid-fight — a death sentence in a cave full of high-level predators.
The standard winning combo is a high-level Yutyrannus accompanied by a pack of Direwolves. The Yuty's Fear Roar reduces enemy damage output, and its Courage Roar buffs your wolf pack. Whistle the wolves forward to trigger Purlovia ambushes safely (so they pop on the wolves, not you), then mop up. Layer Fur Armor, eat Fria Curry, and carry an Otter for the extra insulation.
Pro tip: Save the Snow Cave for last. The other Dragon artifacts (Skylord, Immune) are easier and let you skip the Snow Cave if you're running boss summons rather than completionist runs. But the artifact itself is needed for full ascension — eventually you'll be back here.
Tek Cave Map & Location
Artifact of the Ascension · Leads to the Overseer endgame fight
Lat 43.0, Lon 39.0
The Tek Cave isn't a regular cave — it's the final dungeon of The Island that leads to the Overseer boss fight and triggers Ascension. You can't enter until you've beaten all three Island bosses (Broodmother, Megapithecus, Dragon) at high enough difficulty. The cave is brutally hot, packed with boss-tier creatures including Gigas, and once you start the timer, there's no leaving until it's done.
Treat the Tek Cave like a raid, not a cave run. Bring a full tribe (or a small group of high-level pals), top-tier breeding stock, ascendant gear, and a clear plan. The reward is the Artifact of the Ascension and a path into the Overseer fight that ends the storyline.
Pro tip: If you're solo-ing it, breed and imprint a small army of high-level Rexes (or one mega-Giga) ahead of time. You won't have time to recover between encounters once the run starts.