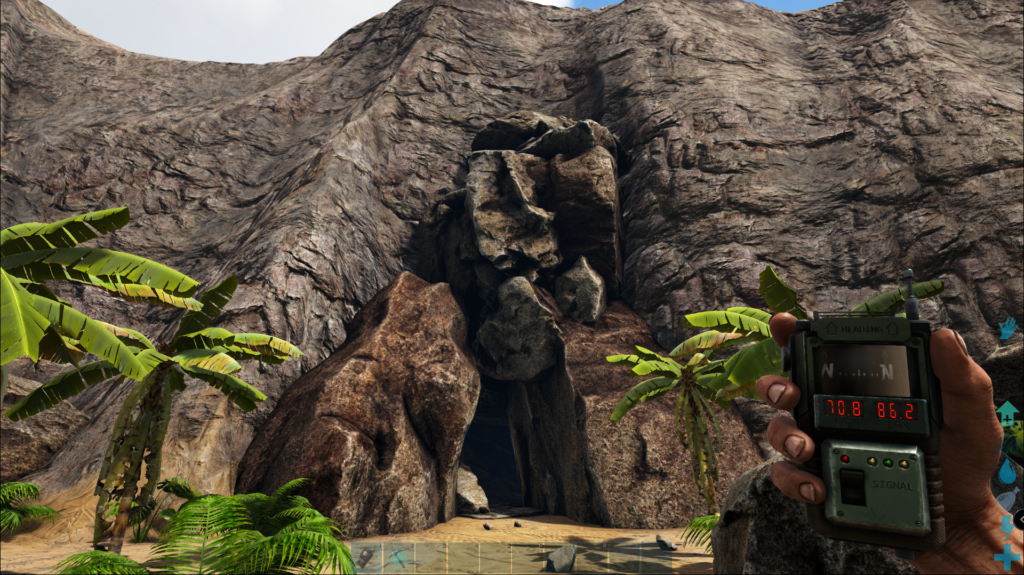
Ark Survival Ascended Ragnarok Artifact Cave Locations

Ark Survival Ascended Ragnarok Cave Locations: “Ice, Rocks & Metal—Your Ultimate Cave Mining Map”
Ragnarok Ascended is ARK’s cold-blooded buffet of ice vaults, crystal caves, lava tunnels, and swamp nightmares—perfect for survivors who love artifact hunting, resource hoarding, and dying in style. With cave damage multipliers that hit 12× on some servers, one wrong step in the Glacier Cave or Carnivorous Caverns can turn your epic run into a respawn montage.
Major Artifact Caves & Coordinates:
Glacier Cave (Artifact of the Pack) ~33.5 LAT / 43.4 LON
Carnivorous Caverns (Artifact of the Immune) ~23.6 LAT / 44.5 LON
Fallen Redwood Cave (Artifact of the Strong) ~24.8 LAT / 24.7 LON
And don’t forget to go diving—deep-sea loot crates (up to 5–6 at once!) glow red along the ocean floor. Bring SCUBA and a good oxygen stat unless drowning’s your new favorite hobby.
Survival Tactics for ARK Survival Ascended Ragnarok Caves
Fur Armor + Fria Curry: Absolute must in glacier caves or frozen boss vaults.
Gas Mask or Hazard Suit: Essential for swamp-infested tunnels.
Tames like Thylacoleo or Rock Drake: Handle vertical shafts and tight combat areas like a pro.
Pro Tip: Ragnarok has metal and crystal-rich buildable caves—great for long-term bases. Just don’t build in boss-only dungeons unless you’re cool with regularly fighting cave mobs in your jammies. And if a Megalania yanks you off a ledge into lava, just smile. You’re not the first… and you won’t be the last.
Ragnarok Caves
1. Carnivorous Caverns
Entrances (5 total):
17.7, 42.4 — Hillside entrance
21.1, 40.4 — Flooded entrance through Castle of the Swamp
21.8, 42.2 — Dead Bluffs water tunnel
Two additional water-tunnel entrances from Viking Bay
Artifacts:
Artifact of the Cunning at ~20.2, 46.0 (requires grappling hook or climbing pick)
Artifact of the Immune at ~23.7, 44.5
Recommendation & Hazards:
Expect dense darkness, Megalosaurus, Megalania, and Onyc spawns.
Safe havens at ~19.0–19.1, 41.7–43.3 provide light, shelter, berries, fiber, and obsidian mining spots.
Use high-intensity light gear—flares, night vision, glow sticks, or turn gamma up—to navigate safely.
Consider flying in via fliers if permitted; it speeds retrieval and reduces melee exposure.
Gear & Tips:
Flintlock/shotgun or higher-tier firearm, grappling hooks, strong light sources, GPS, plenty of torches or glow sticks, flares, and food enough for endurance.
2. Jungle Dungeon (Lava Golem Cave)
Entrances:
18.2, 28.4 and 18.6, 27.8 — Two access points to the jungle cave.
Loot & Strategy:
Optional Lava Golem boss fight drops high-tier loot crates (mastercraft & ascend blueprints).
Highly recommended solo or small group with rocket launchers or high DPS taming strategy.
Bring grappling hooks to reach artifact vault. Skip loot until after boss to avoid encumbrance.
Artifact:
Artifact of the Hunter at ~21.5, 27.2 (requires grappling or climbing)
Threats & Gear:
Creatures: Onyc, Megalosaurus, Megalania, Titanoboa, Piranha, Arthropluera, Pulmonoscorpius, Dung Beetle, Coelacanth
Recommended: Flak Armor – For melee resilience
SCUBA Gear or Lazarus Chowder – Needed for the underwater exit
Crossbow or Pike – Ideal for tight cave combat
Medical Brews – You’ll take damage, guaranteed
Optional: A water mount makes the return trip a breeze.
Strategy:
⚠️ Without a mount, SCUBA gear is mandatory—the vault exit is fully submerged, and swimming out without oxygen will get you killed.
💡 Quick Tip: Use the entrance as an ambush point if running PvP. It’s a tight chokepoint with poor visibility—easy kill zone.
3. Frozen Dungeon (Ice Dungeon)
Entrances:
31.3, 33.7 — Waterfall entrance (shoot or tool to break ice wall)
30.9, 37.8 — Flyer entrance.
Artifact:
Artifact of the Pack at ~33.5, 43.4
Environment & Hazards:
Expect extremely cold temperatures, tons of Iceworms, and Dire Bears.
Iceworm Queen as final boss; iceworms in tunnels.
First section of cave can be flown (if allowed), avoiding bears and grabbing loot crates.
After that, exit flyer, proceed on foot for boss vault. Grappling hooks will not work inside the cave proper
Gear & Strategy:
Riot or fur armor, high-melee stat Otter (for melee + cold resistance), fabricated shield (metal/riot), Fria Curry, cold-resistant foods, raid tames like Thylacoleo or Megatherium, cryopods, ground weapons (shotgun, rifles).
4. Life’s Labyrinth (Wyvern Trench Puzzle Dungeon)
Entrance:
One entrance around ~47.7–48.0, 78.6–79.4 leading into the maze-like labyrinth.
Artifacts:
Located within labyrinth paths (not all in same room):
Skylord at ~47.7, 78.9
Clever at ~48.0, 78.6
Massive & Devious at ~48.9–49.0, 79.4
Cave Features:
Multi-path cave with traps, parkour segments, spike walls, and mini‑bosses.
Creatures include Caprosuchus, Megalodons (if water sections), Spirit Direwolf and Direbear.
Gear Prep:
SCUBA gear (for underwater portions), strong firearm tames or squad, diving food, sleeping bags for respawn staging, flak or riot armor, grappling hooks, patience and mapping consumables (fiber torches, glowsticks).
5. Sunken Ocean (Artifact of the Devourer)
Artifact Only:
Artifact of the Devourer at ~47.4, 2.3 in deep ocean (Sunken Ships region). No associated cave entrance.
Use a fast marine tame (Ichthyosaurus to sprint past threats) or Mosasaur to clear nearby enemies
Hazards & Strategy:
High-level aquatic megafauna like Tusoteuthis, Manta, and enemy players or NPC sharks.
Requires oxygen gear and underwater combat preparation.
6. Artifact of the Strong (Monkey Temple Ruin)
Entrance:
Cave entrance (~24.6, 25.0) leads into the ruin system. Artifact was previously misattributed to the trench caves
Artifact:
Strong is located at ~24.8, 24.7, in the Monkey Temple Ruin—not Wyvern Trench.
Strategy & Hazards:
Expect Therizinosaurus and Spinosaurids in ruin, with complex tunnels and debris.
Secure artifact vault using firearms. Use shield or shoot crouched from cover.
Gear Prep:
Medium‑high tier firearms (longneck rifle, shotgun), riot armor, shield or cover strategy, reliable tame backup, plenty of food and narcotics if tames suffer torpor.
General Tips Across Ark Survival Ascended Ragnarok Cave Locations:
- Always carry GPS or waypoints to avoid getting lost.
- Use spacing structures (torches or pillars) as breadcrumb trails in dark caves.
- Have food, water, and stamina aids.
- Cryopods can help deploy backup tames mid-run.
- Sleep bags placed in safe havens or previous entrances facilitate recovery.
- Adjust artifact run tactics by server rules (e.g. flyer allowed or not) and risk level.
Deep Sea Loot Crate Locations – Ragnarok (ASA)
These crates use the same loot tables as cave and underwater crates and offer a chance for high‑tier items and blueprints.
Land-Based Spawns in Desert / Volcanic Zone (Desert biome):
84.1, 77.0 — Plateau near water at bottom edge of map
70.0, 76.5 — Inland desert plateau
63.2, 78.1 — Central desert high ground
59.7, 76.5 — Desert plateau (south of above)
79.7, 51.9 — On top of plateau inside the desert
Ocean/Water-Adjacent Crates:
🔍 The Real Deal on Ragnarok Water Crate Spawns (ASA or ASE):
- ✅ Crates spawn randomly from a set list of spawn points (about 25–30 known locations).
- ✅ 5–6 crates can be active at once across the map.
- 🔁 They rotate—when one despawns or is looted, another can spawn elsewhere.
- 📍 Crates appear in deep ocean trenches, canyon floors, and the coastline near the desert (especially south and southwest)
💡 Notable Loot Crate Cluster Zones:
While they don’t have fixed positions, common spawn clusters include:
- The southwestern trench near the desert coastline (around 60, 90)
- The northwestern sea canyon (between 12, 24 and 18, 18)
- The deep central ocean trench (roughly 40, 55)
- The southeast deep sea zone, near the wyvern trench edge
- Off the eastern cliffs, near 78, 24
☕ Support the Site
GamesOMG runs on caffeine, curse words, and weirdly persistent nostalgia. If you like what we’re doing:
- Buy Me a Coffee
- Check out our Coin App referral link
- Or just link to the site and pretend you found it on accident
No paywalls. Just useful tools and games people still somehow care about
Bring a fast water mount and a GPS to sweep these zones quickly. Crates glow red and blue underwater—hard to miss if you’re close enough.
For more information, visit: ARK: Survival Ascended – ARK Official Community Wiki